Adventures with helm3 and ArgoCD on Openshift
I was interested in seeing how helm installs and argoCD could work hand-in-hand to ensure the namespace in which you deploy apps can be managed and kept in sync with exactly how you want it. Having used helm I was impressed with its ability to install a number of items into Openshift/Kubernetes easily and upgrade/rollout changes. However, what helm doesn’t do is ensure that what you wanted to install is actually running - or whether what you installed has been modified in any way.
ArgoCD offers a git-ops style approach where it can report differences in the project/namespace and also ensure the namespace is correct as per the manifests in a git repository.
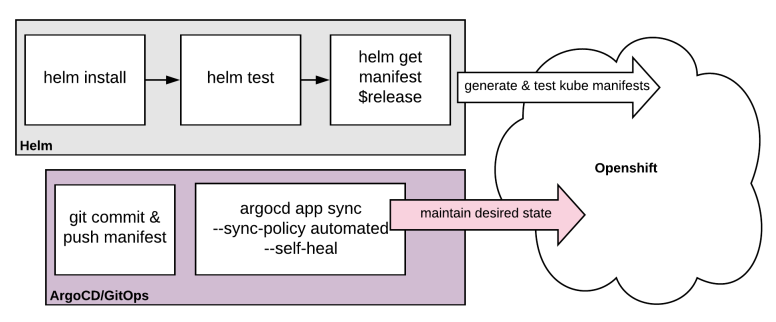
In this article I will attempt to show how helm and arcocd can be used together to install manifests and maintain them as per the diagram:
Initially installed ArgoCD as per the red hat blog article:
1. Deploy ArgoCD
2. Expose ArgoCD
3. Install ArgoCD CLI tool
4. Update ArgoCD admin password
5. Install helm
Confirm that you’re able to navigate to the ArgoCD web interface
Create a helm chart and install
Now, let’s create a helm chart…
We can now see that the chart has been created with a default nginx container and values. Let’s install this into a new project and see what we get…
Running oc new-project helmstuff and helm install on the chart appears to have installed the chart into our environment. Let’s test it out. Part of the helm chart includes a test-connection.yaml which runs a test container that performs a wget against the main nginx container.
We run helm test and….
The result is actually a failure. Well, that is frustrating - helm install reported that the chart was deployed. From a helm perspective I think this is fair since it did its job and the objects have been created in the environment, however, the pod was unable to come up. This was because of the container is attempting to run as root which is naughty. We find this out by inspecting the pod logs.
Let’s add the serviceaccount to the anyuid scc and proceed.
Delete the pod then let’s try uninstalling and reinstalling the chart.
We get success reported again, but let’s test and ensure it is actually working…!
Yes, now we can confirm the pod is running and the helm test command completed successfully. Let’s now extract the manifests and push them to a git repository.
And now let’s create a git repo to store all of this good stuff.
Maintain the manifests with Argo CD
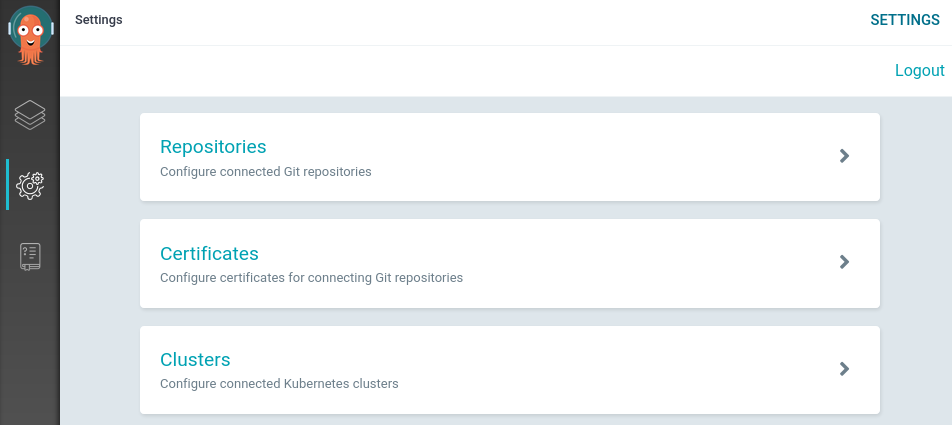
Now we have the app in the environment let’s register our repository with argoCD.
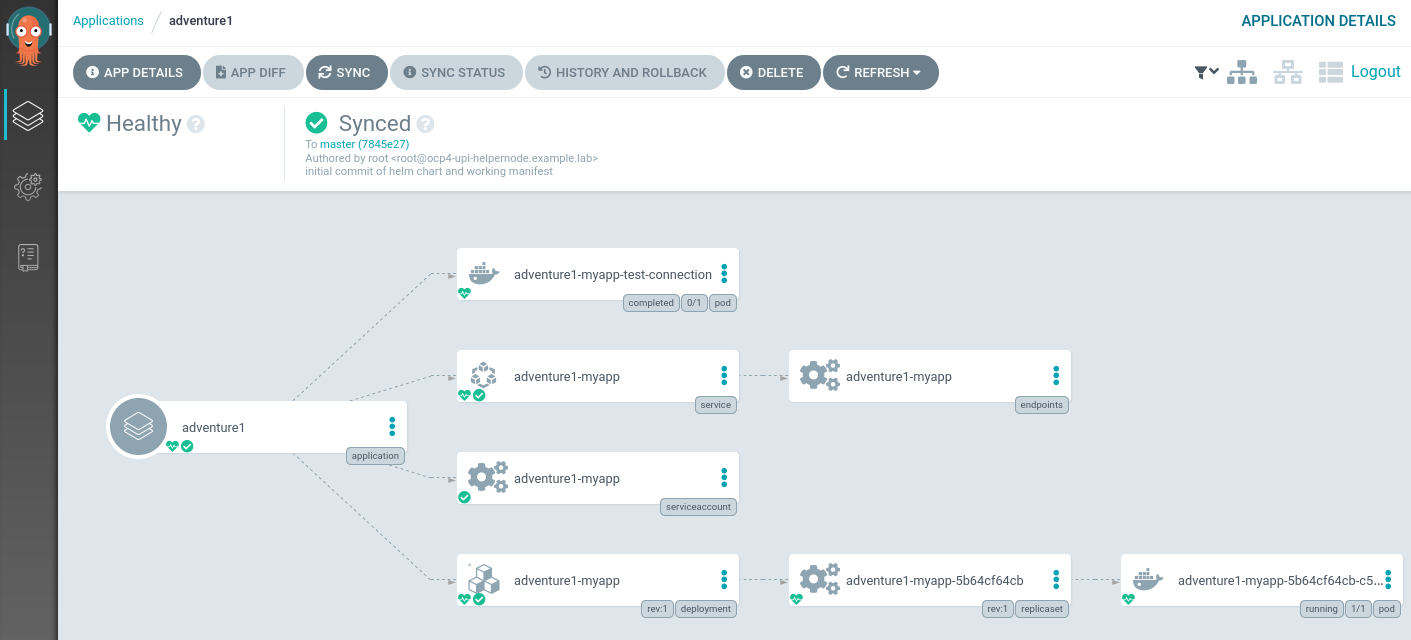
Once this has been done we should see the application in ArgoCD:
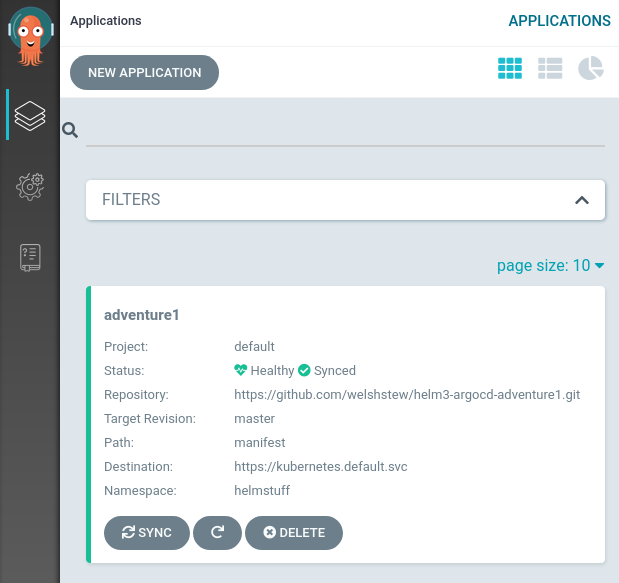
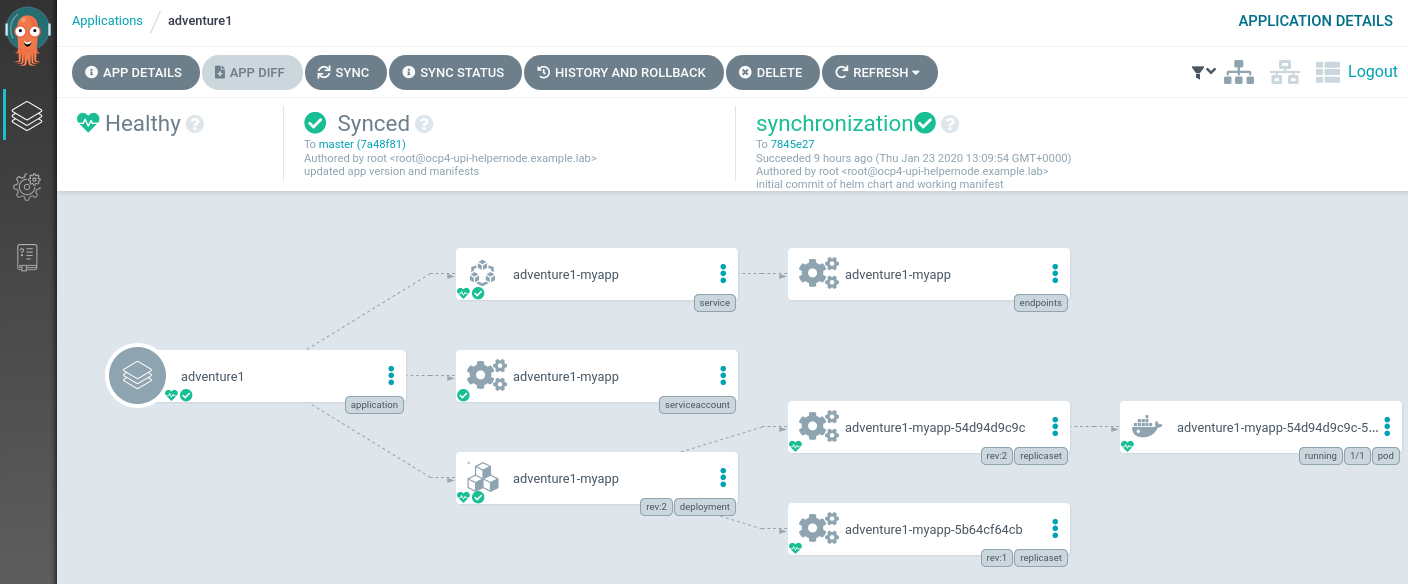
Note that the application is Healthy and Synced. Clicking through, we can see a larger view of the application/kubernetes topology:
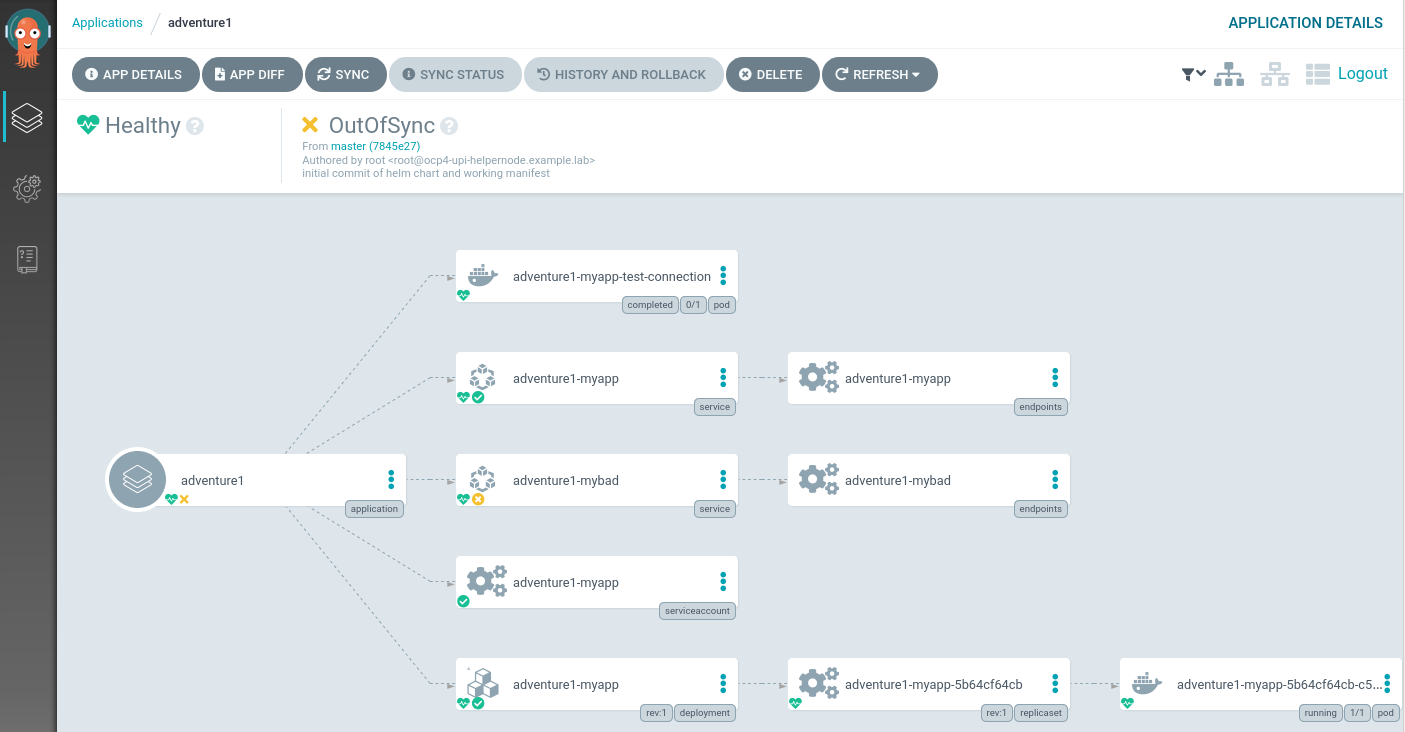
Now, let’s create a new service as part of the application, but not part of the manifests. Here we duplicate the svc/adventure1-myapp, change the name to adventure1-mybad and create the service in the namespace.
We can now see that the application is reported as Healthy, but OutOfSync:
We can let ArgoCD fix this for us! This can be done via the GUI, but the command below does this also:
Let’s try something more destructive. Let’s delete the deployment X-D
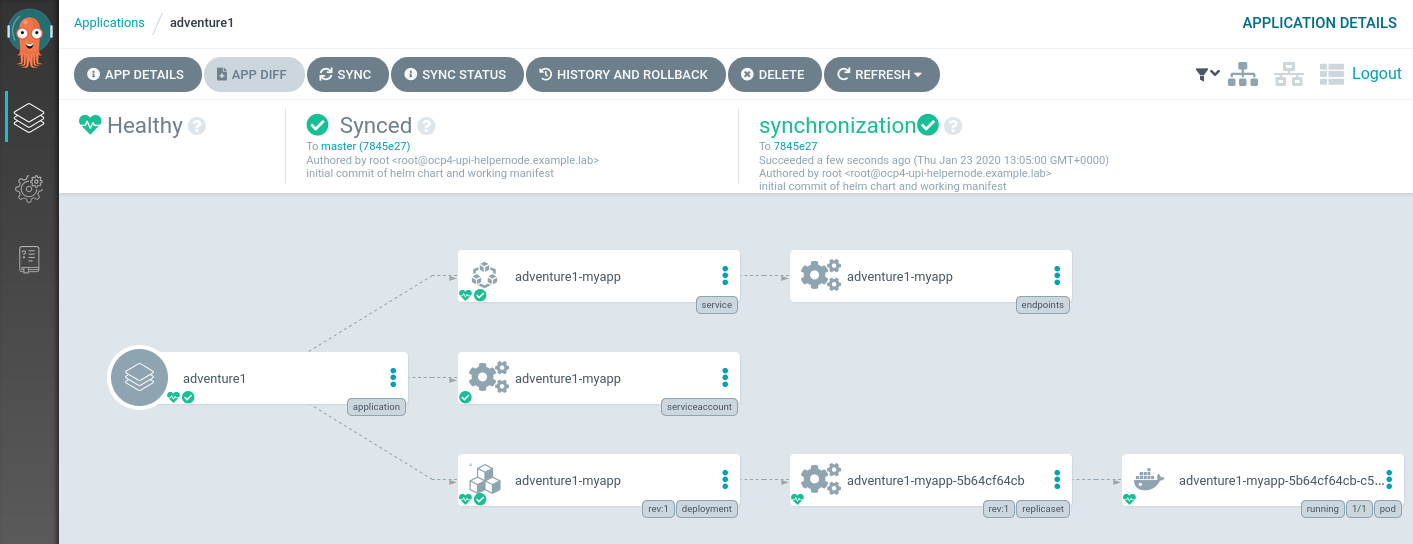
We can see that moments after deleting the deployment that ArgoCD has once again synced the environment to be exactly how described in the git repository manifests directory.
We can also check the state of the application according to ArgoCD via the commandline:
Update and Upgrade a Helm Chart
So this is all looking good. ArgoCD is keeping our installed helm application exactly as we want it thanks to those manifests in git. But what if we want to update our helm chart/deployment? Well, we will need to turn off ArgoCD’s syncing and roll out a new helm chart. For the purposes of this demo I will just update the chart version (and nginx container version).
argocd app set adventure1 --sync-policy none
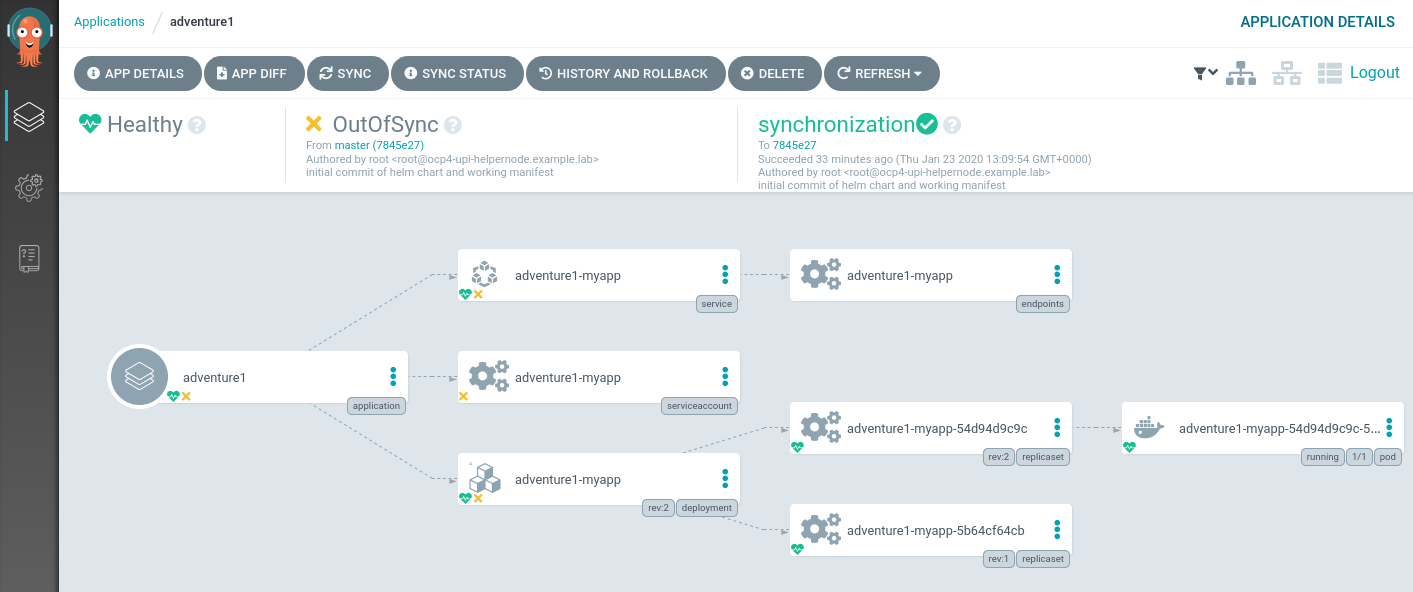
Let’s now rollout this chart and see what happens…
We can see that ArgoCD is reporting the application is out of sync - which is correct.
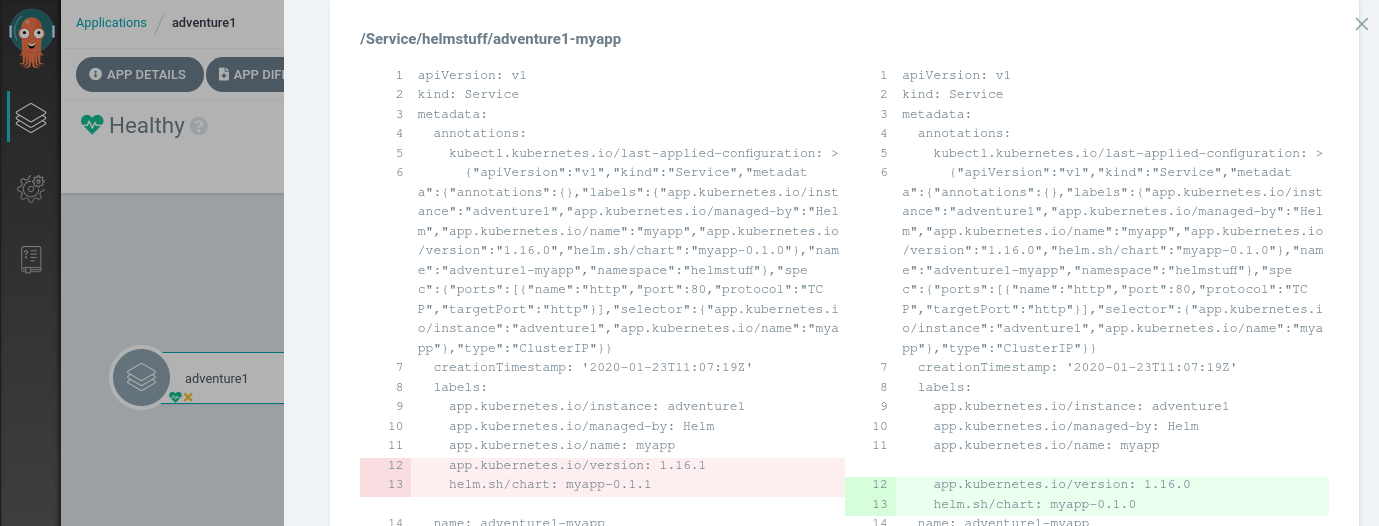
A great feature is to be able to have a visual diff on the changes too:
To finish our upgrade we need to:
- Extract the latest helm manifests
- Push them to the git repository
- Re-enable Argocd for syncing
Now re-enable syncing as we did previously:
We can now see that the objects are fully synchronised, and we are also able to navigate to the git commits in the repo through which they are synchronised.
Conclusion
I can certainly see more people using the latest tillerless helm3 to package up their kubernetes/openshift manifests (nice oc new-app alternative), and ArgoCD seems like a neat way of making sure that the items that are deployed are not interfered with. I could see this workflow being easily added to a build/deploy pipeline. Although ArgoCD could well deploy all the items, I like the way helm packages the charts and allows for values to be easily updated and allows for some testing. Definitely worth considering adding these tools to your (already burgeoning) cloud toolbox.